

This is a solution to add a bit more storage to your scooter and make journey more enjoyable.
During all these years sales for our electric fat tire chopper scooter, also called Citycoco scooters, we get a great amount of demand for the side trunks. With this pair of side trunks, you could carry more with you during your riding. Sometimes a little added storage capacity is just what you need to make your ride more enjoyable. Rain gear, extra clothing and basic supplies are easy to take along when you add luggage to your bike.
Here we have these side trunk options for your electric fat tire chopper scooter model M1P and M8. here’s the brief instruction for the installation steps.
Firstly, open your box and check all the fat scooter spare parts inside. Make sure you did not miss anything.
The box size is: 69*53*30cm, actual weight 13kgs.
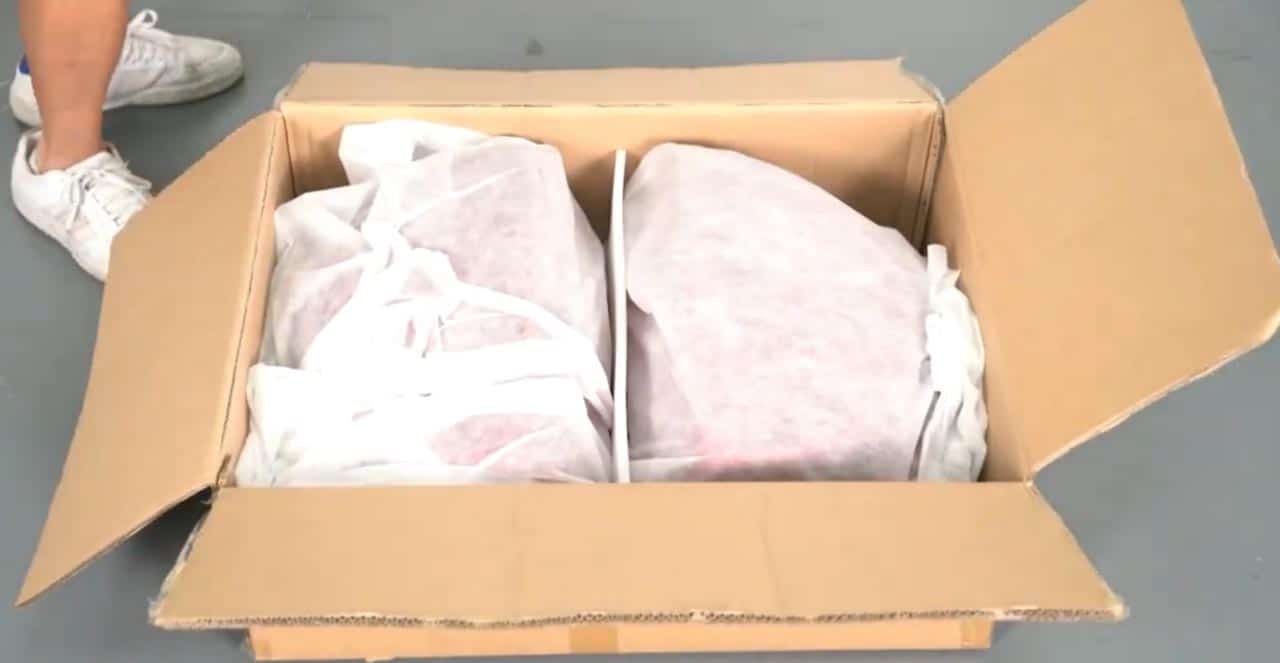
Here are what inside:
2 x side trunks
2 x support métallique
2 x keys(for locking)
2 x wider metal pipe clamps
4 x narrow metal pipe clamps
13 x screws
13 x nuts

Step 1: Mounting bracket
Find the front side of the brackets.

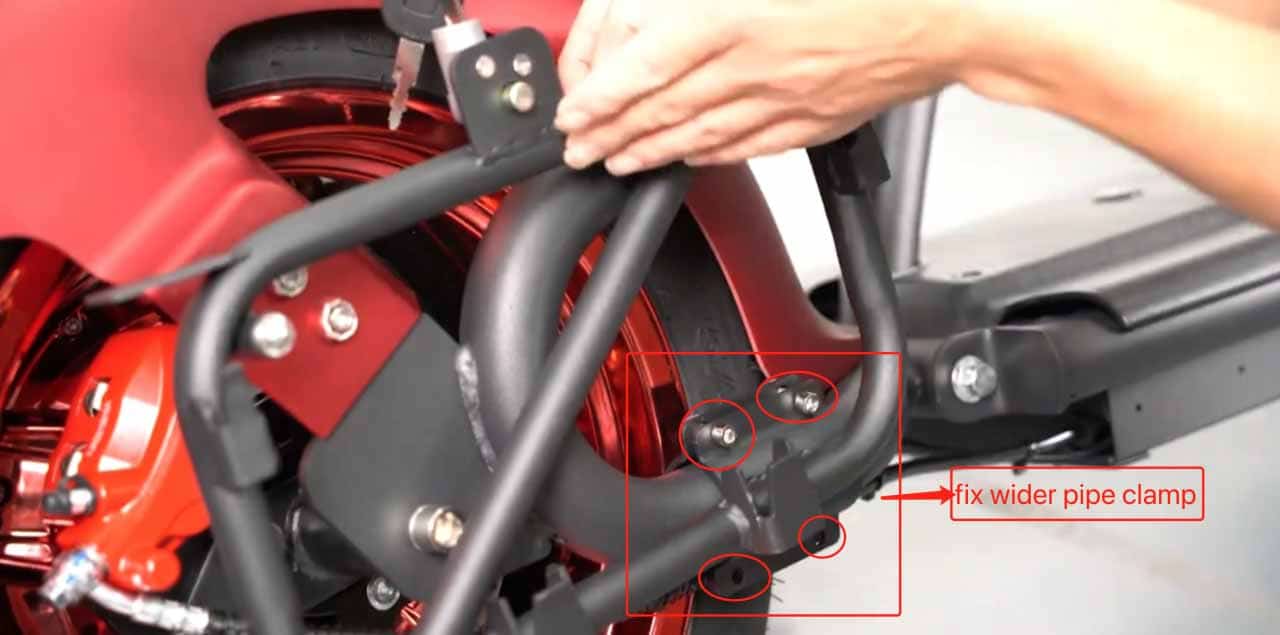
Step 2: fix the metal pipe clamps and tighten screws with Allen wrench
Use the clamps to fix the bracket on your fat tire scooters as below instruction. One side will use 1 pair of wider clamps and 1 pair of narrow clamps. Make sure you tighten all the screws and nuts before you hang on the side trunks.

Step 3: hang the side trunks on the bracket
When you tighten all the screws, you could hang on the side trunks as below instruction. You could see below green and red part circled out. Make sure you slide in well to your fat chopper scooter.


After alignment, shake the side trunk to make sure the stability.
Step 4: lock the side trunks.
Find your keys and clockwise to lock your side trunks.

Then repeat these 4 steps for the other side of installation, you are done with this side trunk installation for your electric chopper scooter.

There are a lot of colors for you to choose from.

We also have other clients who own other fat tire scooter model but also manage to install our saddle trunks with some easy welding jobs. If you are good at DIY and have some tools, you could also do with that. Check some images below for his electric fat chopper scooter DIY:
Before:

After:

We also have other options to add a bracket in your standard saddle trunk so that you could carry more batteries with you. You could check the details here. We will also stock these side trunks in our US and EU warehouse for fast shipping. Contact us now to check availability and make your choice!
Let’s go green go electric! Any comments are welcome as below. Call us or email us if you need any help. LinksEride team is available 24/7.
If you are still not very clear about the installation, you could refer to our youtube channel for installation. Check below: